01_SpringBoot Demo

参考资料1:https://www.springcloud.cc/spring-boot.html
中文文档2:https://felord.cn/_doc/_springboot/2.1.5.RELEASE/_book/index.html
1. SpringBoot 入门
1.1 简介
Spring Boot是基于约定优于配置的,主要作用就是用来简化Spring应用的初始搭建以及开发过程!
1.2 特点
基于Spring的开发提供更快的入门体验。
开箱即用,没有代码生成,也无需 XML 配置,同时也可以修改默认值来满足特定的需求。
提供了一些大型项目中常见的非功能性特性,外部配置等。
SpringBoot 不是对 Spring 功能上的增强,而是提供了一种快速使用 Spring 的方式。
1.3 核心功能
- 起步依赖
起步依赖本质上是一个 Maven 项目对象模型(Project Object Model,POM),定义了对其他库的传递依赖,这些东西加在一起即支持某项功能。
起步依赖就是将具备某种功能的坐标打包到一起,并提供一些默认的功能。
- 自动配置
Spring Boot 的自动配置是一个运行时(应用程序启动时)的过程,考虑了众多因素,才决定 Spring 配置应该用哪个,不该用哪个,该过程是Spring自动完成的。
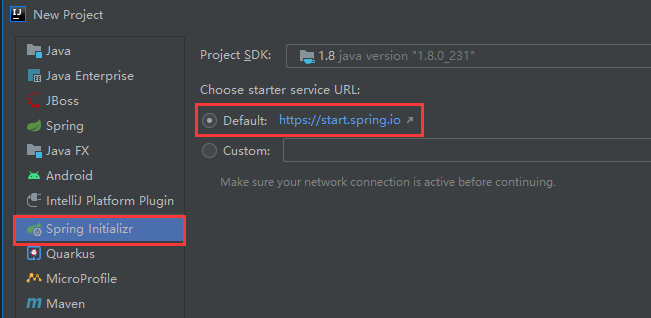
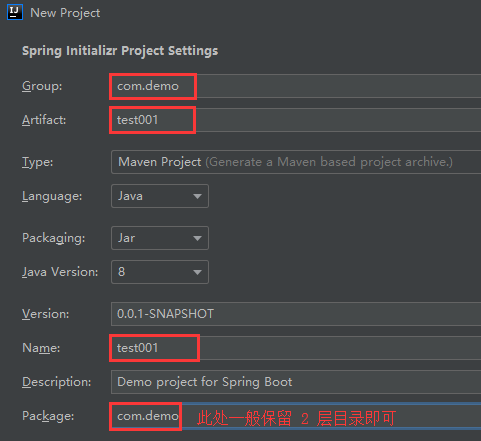
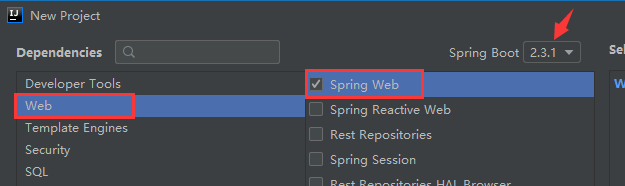
1.4 SpringBoot 工程创建
网站创建地址:https://start.spring.io/
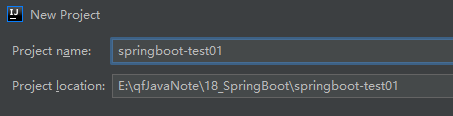
项目创建完成!
此时 pom.xml 文件中会自动导入 springboot 所需依赖,并且在 src 下会生成一个配置类。
注意:
若 pom.xml 中依赖无法下载,需要修改 maven 工程对应的 settings.xml 文件,找到 settings.xml 文件中的镜像配置,原因是 maven 中央仓库下载不下来 springboot 关联的 jar 包,所以使用阿里云的镜像。
2
3
4
5
6
7
8
9
10
11
12
13
14
15
16<mirrors>
<!-- mirror
| Specifies a repository mirror site to use instead of a given repository. The
repository that
| this mirror serves has an ID that matches the mirrorOf element of this mirror.
IDs are used
| for inheritance and direct lookup purposes, and must be unique across the set of mirrors.
|
-->
<mirror>
<id>nexus-aliyun</id>
<mirrorOf>*</mirrorOf>
<name>Nexus-aliyun</name>
<url>http://maven.aliyun.com/nexus/content/groups/public</url>
</mirror>
</mirrors>
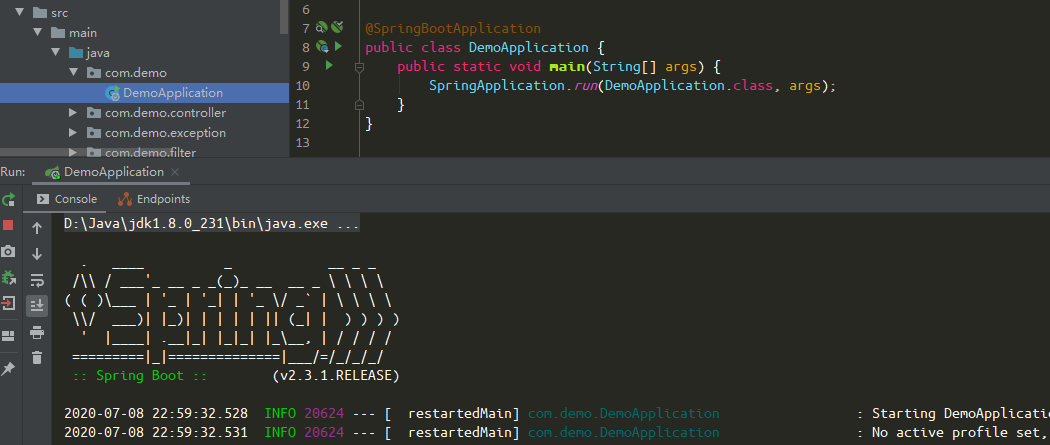
运行配置类 DemoApplication,看到如下页面,表示启动成功!
手动编写 Controller 进行进一步测试:
1 | |
重新启动配置类,测试访问:http://localhost:8080/login
success
2. SpringBoot 热部署
为了方便开发,可以在创建项目时手动勾选热部署,或导入该依赖,就不需要每次重启配置类
1 | |
然后配置自动编译
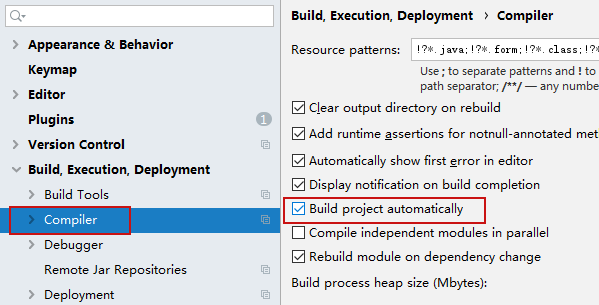
最后 Shift+Ctrl+Alt+/ 选择Registry...(选完之后再次查看一下是否勾选上 running)

再次重新运行一次配置类即可!每次修改工程中任何一处,等待 5s 即可自动编译。
3. SpringBoot 线程问题
默认spring-boot-starter-web 的 controller 是单线程
依赖 spring-boot-starter-webflux 是多线程
spring boot 异步请求处理:
控制器:@Async
启动类:@EnableAsync