
参考资料:
本文全部基于 vue3。
vue3插件:
一、vue3组合式API
组合式api中已经没有了 this (当前对象实例),但是可以通过 getCurrentInstance() 方法获取,特殊用法,一般不需要。
import { getCurrentInstance } from ‘vue’
1
2
3
4
| setup() {
const _this = getCurrentInstance()
}
|
起初定义的是 Vue-Function-API, 后经过社区意见收集,更名为 Vue-Composition-API(VCA)
1. reactive
作用:创建响应式对象,非包装对象,可以认为是模板中的状态。
导入:import { reactive } from “vue”
- template 可以放兄弟节点
- reactive 类以useState, 如果参数是字符串,数字,会报警告,value cannot be made reactive, 所以应该设置
对象,这样可以数据驱动页面。
1
2
3
4
5
6
7
8
9
10
11
12
13
14
15
16
17
18
19
20
21
| <template>
<div>{{ state.count }}-<button @click="add">add</button></div>
</template>
<script>
import { reactive } from "vue"
export default {
setup() {
const state = reactive({
count: 0,
})
const add = () => {
state.count++
}
return {
state,
add,
}
},
}
</script>
|

2. ref
作用:创建一个包装式对象,含有一个响应式属性value,取值或赋值时使用 .value
导入:import { ref } from “vue”
- 它和reactive的差别,就是reactive没有包装属性value
- const count = ref(0),可以接收普通数据类型,操作示例
count.value++
1
2
3
4
5
6
7
8
9
10
11
12
13
14
15
16
17
18
19
20
21
| <template>
<div>{{ count }}-{{ myname }}<button @click="add">add</button></div>
</template>
<script>
import { ref } from "vue"
export default {
setup() {
const count = ref(0) // new Proxy({value: 0})
const myname = ref("jerry") // new Proxy({value: "jerry"})
const add = () => {
count.value++
}
return {
count,
myname,
add,
}
},
}
</script>
|
2.1 ref嵌套在reactive中
ref 嵌套在 reactive 对象中后,就可以整体统一风格使用 state. 进行访问。
1
2
3
4
5
6
7
8
9
10
11
12
13
14
15
16
17
18
19
20
21
| <template>
<div class="home">
home - {{ count }}--{{ state.count }}
<button @click="add">click</button>
</div>
</template>
<script>
import { ref, reactive } from "vue"
export default {
name: "Home",
setup() {
const count = ref(0)
const state = reactive({ count })
const add = () => {
state.count++ // state.count跟前面count都会更新
}
return { count, state, add }
},
}
</script>
|
2.2 toRef | toRefs
toRef() 可以把 reactive 对象转为 ref 对象,如 toRef(state, ‘count’)toRefs() 默认直接展开state,那么此时reactive数据变成普通数据。通过...toRefs()可以把reactive的每个属性展开并转化为对象, 这样就变成多个对象,依然具有响应式特性。同时 dom 可以直接访问。
1
2
3
4
5
6
7
8
9
10
11
12
13
14
15
16
17
18
19
20
21
22
23
24
| <template>
<div class="home">
<!-- ...toRefs(state)后,dom就可以直接访问 count -->
home - {{ count }}
<button @click="add">click</button>
</div>
</template>
<script>
import { reactive, toRefs } from "vue"
export default {
name: "Home",
setup() {
const state = reactive({ count: 1 })
const add = () => {
state.count++
}
return {
...toRefs(state), //展开 state 对象,dom中就可以不需要加 state. 就可以直接访问属性
add,
}
},
}
</script>
|
2.3 ref访问dom或者组件
1
2
3
4
| <input type="text" ref="myinput"/>
//js
const myinput = ref(null)
console.log(myinput.value.value)
|
3. computed 计算属性
computed(() => 逻辑代码) vue3中的计算属性,逻辑代码中不能加大括号。且只能同步。且不要修改计算属性变量的值,会警告 readonly。
导入:import { computed } from “vue”
1
2
3
4
5
6
7
8
9
10
11
12
13
14
15
16
17
18
19
20
21
| <template>
<div>app-{{ myname }}-{{ computedName }}</div>
</template>
<script>
import { reactive, toRefs, computed } from "vue"
export default {
setup() {
const obj = reactive({
myname: "jerry",
})
const computedName = computed(
() => obj.myname.substring(0, 1).toUpperCase() + obj.myname.substring(1)
)
return {
...toRefs(obj),
computedName,
}
},
}
</script>
|
自定义hooks-函数封装复用(★)
search.js
1
2
3
4
5
6
7
8
9
10
11
12
13
14
15
| import { computed, ref } from "vue"
function useSearch(list) {
const mytext = ref("")
const computedList = computed(() =>
list.value.filter(item => item.includes(mytext.value))
)
return {
mytext,
computedList
}
}
export default useSearch
|
App.vue
1
2
3
4
5
6
7
8
9
10
11
12
13
14
15
16
17
18
19
20
21
22
23
24
25
26
27
28
29
| <template>
<div>
<input type="text" v-model="mytext" />
<ul>
<li v-for="item in computedList" :key="item">
{{ item }}
</li>
</ul>
</div>
</template>
<script>
import { ref } from "vue"
import useSearch from "./search"
export default {
setup() {
const datalist = ref([]) //更推荐使用 ref,直接就是响应式属性,dom可以直接用
// 模拟取数据延时
setTimeout(() => {
datalist.value = ["aaa", "abc", "abb", "acc"]
}, 2000)
const {mytext, computedList} = useSearch(datalist)
return { mytext, computedList }
},
}
</script>
|
4. watch 监听
计算属性允许我们声明性地计算衍生值。然而在有些情况下,我们需要在状态变化时执行一些“副作用”:例如更改 DOM,或是根据异步操作的结果去修改另一处的状态。在组合式API中,我们可以使用watch在每次响应式状态发生变化时触发回调函数。
监听器watch是一个方法,它包含参数如下:
- 第一个参数是监听的值,当值发生变化就会触发监听器的回调函数(
推荐监听 ref 创建的响应式数据)
- 第二个参数是回调函数,可以执行监听时候的回调
- [可选]第三个参数
{ immediate: true } 页面访问时会立即执行一次,且当监听的值改变时再次执行
- [可选]第三个参数
{ deep: true } 开启深度监听,在不确定对象内什么值会被改变的情况下使用(会有一定的性能损耗)
1
2
3
4
5
6
7
8
9
10
11
12
13
14
15
16
17
18
19
20
21
22
23
24
25
26
27
28
29
30
31
32
33
| <template>
<div>
<input type="text" v-model="text">
</div>
</template>
<script>
import { ref, watch } from "vue";
export default {
setup() {
const text = ref("")
//写法1, 如果监听多个使用数组 watch([text1, text2], ...)
watch(text, (val) => {
console.log(`1-> text is ${val}`)
})
//写法2
watch(text, (newVal, oldVal) => {
console.log(`2-> oldVal is ${oldVal}, newVal is ${newVal}`)
},
//页面访问时会立即执行一次,且当'text'改变时再次执行
{ immediate: true }
)
//写法3: 用于 const text = reactive({ value: '' }) 创建的响应式对象,就可以监听其中包含的具体属性。否则就会监听冗余了。
watch(() => text.value, (val) => {
console.log(`3-> text is ${val}`)
}
)
return {
text
}
},
}
</script>
|
结合 async 和 await 使用:
1
2
3
4
| watch(text, async (val) => {
let res = await axios(`http://xxx/api?search=${val}`)
console.log(res.data)
})
|
案例:watch+async+await+封装
数据 test.json 使用 json-server 启动模拟db的数据:json-server --watch .\test.json
全局 json-server: npm i json-server -g
1
2
3
4
5
6
7
8
9
10
11
12
13
14
15
16
17
18
19
20
21
22
23
24
25
26
27
28
29
30
31
32
33
34
35
36
37
38
39
40
41
42
43
44
45
46
47
48
49
| {
"news": [
{
"id": 1,
"author": "jerry",
"content": "jerry-1111"
},
{
"id": 2,
"author": "jerry",
"content": "jerry-2222"
},
{
"id": 3,
"author": "jerry",
"content": "jerry-3333"
},
{
"id": 4,
"author": "tom",
"content": "tom-1111"
},
{
"id": 5,
"author": "tom",
"content": "tom-2222"
},
{
"id": 6,
"author": "tom",
"content": "tom-3333"
},
{
"id": 7,
"author": "spike",
"content": "spike-1111"
},
{
"id": 8,
"author": "spike",
"content": "spike-2222"
},
{
"id": 9,
"author": "spike",
"content": "spike-3333"
}
]
}
|
App.vue - 调用方(currentSelect 因为 v-model 双向绑定,因此选中的值就会被赋值为 option 的 value )
1
2
3
4
5
6
7
8
9
10
11
12
13
14
15
16
17
18
19
20
21
22
23
24
25
26
27
28
29
30
31
32
33
34
35
36
| <template>
<div>
<select v-model="currentSelect">
<option v-for="item in optionList" :key="item" :value="item">
{{ item }}
</option>
</select>
<input type="text" v-model="mytext" />
<ul>
<li v-for="item in computedList" :key="item.id">{{ item.content }}</li>
</ul>
</div>
</template>
<script>
import { ref } from "vue"
import useList from "./useList"
import useSearch from "./useSearch"
export default {
setup() {
const optionList = ref(["jerry", "tom", "spike"])
const currentSelect = ref("jerry")
const mytext = ref("")
const { contentList } = useList(currentSelect)
const { computedList } = useSearch(mytext, contentList)
return {
optionList,
currentSelect,
contentList,
mytext,
computedList,
}
},
}
</script>
|
useList.js - 封装函数方法
1
2
3
4
5
6
7
8
9
10
11
12
13
14
15
16
17
18
19
| import axios from "axios"
import { ref, watch } from "vue"
function useList(selectVal) {
const contentList = ref([])
watch(selectVal,
async val => {
let res = await axios.get(`http://localhost:3000/news?author=${val}`)
console.log("res.data->", res.data)
contentList.value = res.data
},
{
immediate: true,
}
)
return { contentList }
}
export default useList
|
useSearch.js - 封装函数方法
1
2
3
4
5
6
7
8
9
10
11
| import { computed } from "vue"
function useSearch(text, list) {
const computedList = computed(() => list.value.filter(item => item.content.includes(text.value)))
return {
computedList
}
}
export default useSearch
|
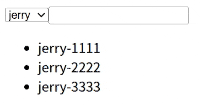
效果:
5. watchEffect() 函数
(1) watch
- 具有一定的惰性lazy第一次页面展示的时候不会执行,只有数据变化的时候才会执行 或 设置 {immediate: true} 第一次才会执行
- 参数可以拿到当前值和原始值
- 可以侦听多个数据的变化,用一个侦听器承载
1
2
3
4
5
6
7
8
| const todoId = ref(1)
const data = ref(null)
watch(todoId, async () => {
const response = await fetch(
'https://jsonplaceholder.typicode.com/todos/${todoId.value}\ )
data.value = await response.json()
}, { immediate: true })
|
(2) watchEffect
立即执行,没有惰性,页面的首次加载就会执行。- 自动检测内部代码,代码中有依赖便会执行
- 不需要传递要侦听的内容会
自动感知代码依赖,不需要传递很多参数,只要传递一个回调函数
- 不能获取之前数据的值只能获取当前值
- 一些异步的操作放在这里会更加合适
1
2
3
4
5
6
| watchEffect(async () => {
const response = await fetch(
'https://jsonplaceholder.typicode.com/todos/${todoId.value}\
)
data.value = await response.json()
})
|
写法对比:
1
2
3
4
5
6
7
8
9
10
11
12
13
14
15
16
17
18
19
| import axios from "axios"
import { ref, watchEffect } from "vue"
function useList(selectVal) {
const contentList = ref([])
watchEffect(async () => {
let res = await axios.get(`http://localhost:3000/news?author=${selectVal.value}`)
console.log("res.data->", res.data)
contentList.value = res.data
})
return { contentList }
}
export default useList
|
6. props & emit
1
2
3
4
5
6
7
8
| export default {
setup(props, context) {
console.log(context.attrs)
console.log(context.slots)
console.log(context.emit)
console.log(context.expose)
}
}
|
如解构 props 和 emit:
1
2
3
4
5
| props: ["mytitle"],
setup({mytitle}, {emit}) {
console.log(mytitle)
emit("myevent")
}
|
7. provide & inject
组件之间跨级通信,而且是响应式的。
在父组件中:
首先导入 provide 函数:import { provide, ref } from ‘vue’;
在 setup 函数中使用 provide 提供一个值。例如,提供一个名为 message 的字符串:
1
2
3
4
5
6
7
8
9
10
| import { provide, ref } from 'vue';
export default {
setup() {
const message = ref('This is a provided message');
provide('message-key', message);
return {
message
};
}
};
|
这里的 ‘message-key’ 是一个自定义的键,用于在子孙组件中识别要注入的值。
在子孙组件中:
1
2
3
4
5
6
7
8
| <template>
<div> {{ injectedMessage }} </div>
</template>
<script setup>
import { inject } from 'vue';
const injectedMessage = inject('message-key');
</script>
|
8. 生命周期
生命周期图示vue3:
每个Vue组件实例在创建时都需要经历一系列的初始化步骤,比如设置好数据侦听,编译模板,挂载实例到 DOM,以及在数据改变时更新DOM。在此过程中,它也会运行被称为生命周期钩子的函数,让开发者有机会在特定阶段运行自己的代码。
beforeCreate() 会在实例初始化完成、props解析之后、data()和computed等选项处理之前立即调用。
created() 当这个钩子被调用时,以下内容已经设置完成:响应式数据、计算属性、方法和侦听器。然而,此时挂载阶段还未开始,因此$el属性仍不可用。
beforeMount() 当这个钩子被调用时,组件已经完成了其响应式状态的设置,但还没有创建DOM节点。它即将 首次执行DOM渲染过程。
mounted() 所有同步子组件都已经被挂载。这个钩子通常用于执行需要访问组件所渲染的DOM树相关的作用。—— 最常用
- 场景:订阅发布、ajax、setInterval、访问dom
beforeUpdate() 这个钩子可以用来在Vue更新DOM之前访问DOM状态。在这个钩子中更改状态也是安全的。
updated() 这个钩子会在组件的任意DOM更新后被调用,这些更新可能是由不同的状态变更导致的。如果你需要在某个特定的状态更改后访问更新后的DOM,请使用 nextTick() 作为替代。
beforeUnmount() 当这个钩子被调用时,组件实例依然还保有全部的功能。
unmounted() 在一个组件实例被卸载之后调用。
- 场景:解绑事件如窗口大小变动监听window.onresize=null

| vue2 |
vue3 |
| beforeCreate |
setup(()=>{}) |
| created |
setup(()=>{}) |
| beforeMount |
onBeforeMount(()=>{}) |
| mounted |
onMounted(()=>{}) |
| beforeUpdate |
onBeforeUpdate(()=>{}) |
| updated |
onUpdated(()=>{}) |
| beforeDestroy |
onBeforeUnmount(()=>{}) |
| destroyed |
onUnmounted(()=>{}) |
总结:
- Vue2和Vue3钩子变化不大,beforeCreate 、created 两个钩子被 setup() 钩子来替代。
- 生命周期钩子函数一般都写在 setup() {…} 中。
1
2
3
4
5
6
7
8
| import { onUnmounted, onMounted } from 'vue'
setup() {
...
onMounted(() => {
console.log('onMo unted')
})
...
}
|
9. setup 语法糖(★)
<script setup> ... </script>
- 更少的样板内容,更简洁的代码
- 能够使用纯 TypeScript 声明 props 和 自定义事件
- 更好的运行时性能(其模版会被编译成同一作用域内的渲染函数,避免了渲染上下文代理对象)
- 更好的 IDE 类型推导性能(减少了语言服务器从代码中抽取类型的工作)
9.1 顶层绑定
声明的顶层的绑定(包括变量、函数、以及 import 导入的内容)都能在模版中直接使用(无需 return):
1
2
3
4
5
6
7
8
9
10
11
12
13
14
15
16
17
18
19
20
21
22
| <template>
<div>
app-{{ msg }}-{{ myname }}-{{ myage }}
<button @click="handleClick">click</button>
</div>
</template>
<script setup>
import { reactive, ref, toRefs } from 'vue';
const msg = ref("hello,message")
const state = reactive({
myname: 'jerry',
myage: 18
})
const {myname, myage} = {...toRefs(state)}
const handleClick = () => {
msg.value = "hello,world"
myage.value = 22
}
// 不需要return返回了,直接使用响应式变量和方法
</script>
|
9.2 响应式
响应式状态需要明确使用响应式 api 来创建,和 setup() 函数的返回值一样,ref 再模版中使用的时候会自动解包。
1
2
3
4
5
6
7
8
9
10
| <template>
<div>
<button @click="count++">{{ count }}</button>
</div>
</template>
<script setup>
import { ref } from 'vue';
const count = ref(0)
</script>
|
9.3 使用组件
1
2
3
4
5
6
7
| <template>
<MyComponent />
</template>
<script setup>
import MyComponent from './MyComponent.vue'
</script>
|
9.4 动态组件
1
2
3
4
5
6
7
8
9
| <template>
<component :is="Foo" />
<component :is="someCondition ? Foo : Bar" />
</template>
<script setup>
import Foo from './Foo.vue'
import Bar from './Bar.vue'
</script>
|
9.5 指令
必须遵守 vNameDirective 这样的小写开头驼峰命名规范,驼峰大写 使用时转为 -小写。
1
2
3
4
5
6
7
8
9
10
11
| <template>
<h1 v-my-directive>This is a Head.</h1>
</template>
<script setup>
const vMyDirective = { //局部指令
beforeMount: (el) => {
el.style.backgroundColor = 'yellow' //在元素上做的操作
}
}
</script>
|
9.6 通信 defineProps | defineEmits
推荐<script setup> 中使用。
props在子组件中:
1
2
3
| const props = defineProps({
message: String
});
|
1
2
3
4
5
6
7
8
9
10
11
12
13
14
15
16
17
18
19
20
21
22
23
24
25
26
27
28
29
30
31
32
33
34
35
36
37
38
39
40
41
42
43
44
45
46
47
48
49
| defineProps({
propA: Number,
propB: [String, Number],
propC: {
type: String,
required: true
},
propD: {
type: [String, null],
required: true
},
propE: {
type: Number,
default: 100
},
propF: {
type: Object,
default(rawProps) {
return { message: 'hello' }
}
},
propG: {
validator(value, props) {
return ['success', 'warning', 'danger'].includes(value)
}
},
propH: {
type: Function,
default() {
return 'Default function'
}
}
})
|
defineProps() 宏中的参数不可以访问 <script setup> 中定义的其他变量,因为在编译时整个表达式都会被移到外部的函数中。
1
2
3
4
| <template>
<div>{{ props.message }}</div>
</template>
<!-- <div>{{ props.message }}</div> 直接写成 <div>{{ message }}</div> 也可以正常显示 -->
|
emit在子组件中:
1
| const emits = defineEmits(['custom-event']);
|
1
2
3
4
| const someFunction = () => {
const dataToSend = 'Some data from child';
emits('custom-event', dataToSend);
};
|
在父组件中:
在使用子组件时监听子组件发出的事件:
1
2
3
4
5
6
7
8
9
10
| <template>
<ChildComponent @custom-event="handleChildEvent" />
</template>
<script setup>
import { ref } from 'vue';
import ChildComponent from './ChildComponent.vue';
const handleChildEvent = (data) => {
console.log('child传过来的数据:', data);
};
</script>
|
9.7 暴露 defineExpose
暴露子组件属性或方法,参考官方文档:https://cn.vuejs.org/api/sfc-script-setup.html#defineexpose
使用 <script setup> 的组件是默认关闭的——即通过模板引用或者 $parent 链获取到的组件的公开实例,不会暴露任何在 <script setup> 中声明的绑定。
可以通过 defineExpose 编译器宏来显式指定在 <script setup> 组件中要暴露出去的属性。
1
2
3
4
5
6
7
8
9
10
11
| <script setup>
import { ref } from 'vue'
const a = 1
const b = ref(2)
defineExpose({
a,
b
})
</script>
|
