参考:
1. Node.js 基础 1.1 介绍 Node.js 是一个 JavaScript 运行环境。它让 JavaScript 可以开发后端程序,实现几乎其他后端语言实验的所有功能,可以与 PHP、Java、Python、.net、Ruby等后端语言平起平坐。
Nodejs是基于V8引擎,V8是Google发布的开源JavaScript引擎,本身就是用于Chrome浏览器的js解释部分,但是Ryan Dahl 这哥们,鬼才般的,把这个V8搬到了服务器上,用于做服务器的软件。
nodejs的特性
核心特点
单线程:Node.js 使用单线程处理请求
事件循环:通过事件驱动机制处理并发
非阻塞 I/O:I/O 操作不会阻塞主线程
跨平台:可以在 Windows、Linux、macOS 等系统上运行
工作机制
1.2 安装&插件 可选版本:16+版本,18+版本,20+版本
Node.js 下载地址:https://nodejs.cn/download/
安装注意事项(以 windows 为例):
node 安装步骤参考:https://www.runoob.com/nodejs/nodejs-install-setup.html
如果安装了 nvm 就可以使用 nvm 命令安装指定的 node 版本。
nvm 安装和使用:https://www.runoob.com/nodejs/nodejs-nvm.html
命令如下:
1
2
3
nvm install 18.20.3
插件推荐:
Node.js Extension Pack :包含多个 Node.js 相关插件的集合包JavaScript (ES6) code snippets :提供 ES6+ 代码片段npm Intellisense :npm 包自动补全Path Intellisense :文件路径自动补全
1.3 验证使用 hello.js
1
2
3
4
5
6
7
console .log ("hello,nodejs" );function test (console .log ("test function" );test ()
1
2
3
> node .\01 -hello .js
Node 中没有 bom 和 dom,只能以基础的 JavaScript 语法来进行开发,比如遵循 ES6 标准。
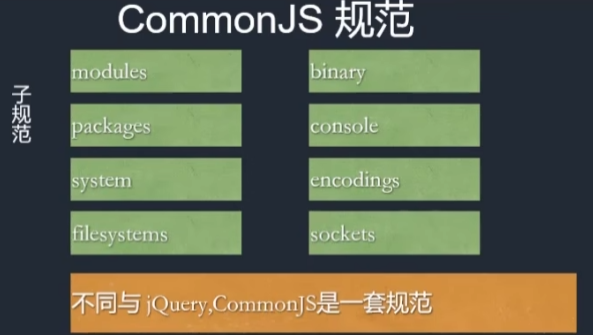
1.4 commonJS规范 - 【CJS】 为什么需要模块化开发?
commonJS(模块化)规范:
模块化规范写法 公共功能抽离为一个单独的 js 文件,它作为一个模块。默认情况下面这个模块里面的方法或者属性,外面是没法访问的。如果要让外部可以访问模块里面的方法或者属性,就必须在模块里面通过 exports 或者 module.exports 暴露属性或者方法。
模块定义 ./js/a.js
1
2
3
4
5
6
7
8
9
10
11
12
13
14
function test (console .log ("a.test" );function test2 (console .log ("a.test2" );exports .test = testexports .test2 = test2
index.js
1
2
3
4
5
let moduleA = require ('./js/a' )console .log (moduleA);test ()test2 ()
内部方法以 _ 下划线开头,并且不导出,其他模块就无法使用。如:
1
2
3
function _init (console .log ("内部方法 _init" );
1.5 npm & nrm & yarn npm 1 2 3 4 5 6 7 8 9 npm init
使用参数 --legacy-peer-deps 告诉 npm 忽略对等依赖冲突,并以与较旧的 npm 版本相同的方式安装依赖。这种方法不会严格强制对等依赖解析,这可以帮助避免安装失败,同时保留依赖树的整体完整性。
npm init 初始化一个 npm 仓库,会创建一个 package.json,用于维护包的基本信息和依赖版本。
1 2 3 4 5 6 7 8 9 10 11 12 13 14 15 16 17 18 19 20 21 22 23 24 25 26 27 28 29 30 31 32 33 34 This utility will walk you through creating a package.json file.help init` for definitive documentation on these fieldsdo .in the package.json file.test aaa test command : "name" : "aaa" ,"version" : "1.0.0" ,"description" : "test aaa" ,"main" : "index.js" ,"scripts" : {"test" : "echo \"Error: no test specified\" && exit 1" "author" : "jerry" ,"license" : "ISC" yes )
版本号符号含义:
1 2 3 "dependencies" : { "md5" : "^2.1.0" }"dependencies" : { "md5" : "~2.1.0" }"dependencies" : { "md5" : "*" }
^ 表示在 npm i 时将会安装 md5 2.*.* 最新版本~ 表示在 npm i 时将会安装 md5 2.1.* 最新版本 * 表示在 npm i 时将会安装 md5 的最新版本
nrm
NRM (npm registry manager)是npm的镜像源管理工具,有时候国外资源太慢,使用这个就可以快速地在 npm 源间切换。
手动切换镜像为淘宝镜像:npm config set registry https://registry.npmmirror.com
1 2 3 4 5 6 7 8 9 10 ls test
cnpm 国内镜像安装:npm i cnpm -g –registry=https://registry.npmmirror.com
就可以完全替代 npm,默认就连接到 taobao 镜像。
这是一个完整的 npmjs.org 镜像,可以用此代替官方版本(只读),同步频率为10分钟一次,保证尽量与官方服务同步。
yarn yarn[jɑːn],与 jar 基本同音。
安装命令:npm i yarn -g
对比npm:
1 2 3 4 5 6 7 8 9 10 11 12
1.6 nodemon|node-dev 自动重启 安装:npm i nodemon -g
每次保存代码就会自动重启服务器。
启动命令不变:nodemon ./test.js
另一种方案(开发阶段使用):npm i node-dev -g
启动命令就需要换成:node-dev ./test.js
禁用掉无关警告信息:node-dev –no-notify ./index.js
设置默认关闭无关警告信息:D:\nvm\nvm\v18.20.3\node-dev.ps1
1 2 3 4 5 6 7 8 9 10 11 12 13 14 15 16 17 18 19 20 21 22 23 24 25 26 27 28 $basedir =Split-Path $MyInvocation .MyCommand.Definition -Parent $exe ="" if ($PSVersionTable .PSVersion -lt "6.0" -or $IsWindows ) {$exe =".exe" $ret =0 if (Test-Path "$basedir /node$exe " ) {if ($MyInvocation .ExpectingInput) {$input | & "$basedir /node$exe " "$basedir /node_modules/node-dev/bin/node-dev" --no-notify $args else {"$basedir /node$exe " "$basedir /node_modules/node-dev/bin/node-dev" --no-notify $args $ret =$LASTEXITCODE else {if ($MyInvocation .ExpectingInput) {$input | & "node$exe " "$basedir /node_modules/node-dev/bin/node-dev" --no-notify $args else {"node$exe " "$basedir /node_modules/node-dev/bin/node-dev" --no-notify $args $ret =$LASTEXITCODE exit $ret
2. 内置模块 - 模块化开发
以 node 18 版本文档为参考:https://nodejs.cn/api/v18/zlib.html
所有模块使用前都需要导入,导入方式有两种:
CJS,即 commonJS 规范ESM,即 ES6 规范(JavaScript 模块化标准 )
2.0 ES 规范 - 【ESM】
导出方式
导入方式
特点
export default xxximport 任意名称 from '模块'一个模块只能有一个默认导出
export const xxx = ...import { xxx } from '模块'支持多个命名导出
模块化开发,需要在当前目录下 npm init ,然后在 package.json 添加 "type": "module", 字段
1 2 3 4 5 6 7 8 9 10 11 12 { "name" : "aaa" , "version" : "1.0.0" , "main" : "index.js" , "type" : "module" , "scripts" : { "test" : "echo \"Error: no test specified\" && exit 1" } , "author" : "jerry" , "license" : "ISC" , "description" : "" }
示例
module/moduleA.js
1 2 3 4 5 6 const moduleA = {getName (return 'jerry' export default moduleA
module/moduleB.js
1 2 3 4 5 6 7 8 const moduleB = {getName (return 'tom' export {
index.js
1 2 3 4 5 6 import moduleA from "./module/moduleA.js" ; import { moduleB } from "./module/moduleB.js" ;console .log (moduleA.getName ()); console .log (moduleB.getName ());
2.1 http 模块 2.1.1 http CJS const http = require('http'); ESM import http from 'http';
要使用 HTTP 服务器和客户端,则必须 require('http')。
最简单的启动一个服务器:
1 2 3 4 5 6 7 8 9 10 11 12 13 const server = http.createServer ();on ("request" , (req, res ) => {writeHead (renderStatus (req.url ), { "Content-Type" : "text/html;charset=UTF-8" })write (renderHTML (req.url ))end ()listen (3000 , () => {console .log ("server start :3000" );
模拟路由和响应html:
1 2 3 4 5 6 7 8 9 10 11 12 13 14 15 16 17 18 19 20 21 22 23 24 25 26 27 28 29 30 31 32 33 34 35 36 37 38 39 40 41 42 43 44 45 46 47 48 49 50 51 var http = require ("http" )const server = http.createServer ();on ("request" , (req, res ) => {console .log (req.url ); writeHead (renderStatus (req.url ), { "Content-Type" : "text/html;charset=UTF-8" })write (renderHTML (req.url ))end ()listen (3000 , () => {console .log ("server start :3000" );function renderStatus (url ) {let urls = ['/home' , '/list' ]return urls.includes (url) ? 200 : 404 function renderHTML (url ) {switch (url) {case '/home' :return ` <html> <b>hello,wrold</b> <b>大家好</b> </html> ` case '/list' :return ` <html> <b>hello,wrold</b> <b>list页面</b> </html> ` default :return ` <html> <b>404页面</b> </html> `
2.1.2 接口 jsonp jsonp.js - 主要解决跨域。原理:动态创建 script 标签-没有跨域限制,指向后端接口,返回一个前端提前定义好的 callback 方法。
1 2 3 4 5 6 7 8 9 10 11 12 13 14 15 16 17 var http = require ("http" )var url = require ("url" )createServer ((req, res ) => {var urlobj = url.parse (req.url , true )console .log (urlobj.query .callback ); switch (urlobj.pathname ) {case "/api/aaa" :end (`${urlobj.query.callback} (${JSON .stringify({ name: 'jerry' , age: 20 })} )`break ;default :end ("404" )listen (3000 )
index.html
1 2 3 4 5 6 7 8 9 10 11 <body > <script > var oscript = document .createElement ("script" ) oscript.src = "http://localhost:3000/api/aaa?callback=test" document .body .appendChild (oscript) function test (obj ) { console .log ("test ->" , obj); } </script > </body >
2.1.3 跨域 cors node解决跨域:"access-control-allow-origin": "*" 允许跨域响应头
1 2 3 4 5 6 7 8 9 10 11 12 13 14 15 16 17 18 19 20 21 var http = require ("http" )var url = require ("url" )createServer ((req, res ) => {var urlobj = url.parse (req.url , true )writeHead (200 , {"Content-Type" : "application/json;charset=utf-8" ,"Access-Control-Allow-Origin" : "*" switch (urlobj.pathname ) {case "/api/aaa" :end (`${JSON .stringify({ name: 'jerry' , age: 20 })} `break ;default :end ("404" )listen (3000 )
index.html
1 2 3 4 5 6 7 8 9 <body > <script > fetch ("http://127.0.0.1:3000/api/aaa" ) .then (res =>json ()) .then (res => console .log (res); }) </script > </body >
2.1.4 模拟 get node 模拟客户端,请求到跨域的数据,返回给自己的前端页面。
httpGet(() => {...}) 回调函数方式,解耦 res 的处理逻辑
1 2 3 4 5 6 7 8 9 10 11 12 13 14 15 16 17 18 19 20 21 22 23 24 25 26 27 28 29 30 31 32 33 34 35 36 37 38 var http = require ("http" )var https = require ("https" )var url = require ("url" )createServer ((req, res ) => {var urlobj = url.parse (req.url , true )writeHead (200 , {"Content-Type" : "application/json;charset=utf-8" ,"Access-Control-Allow-Origin" : "*" switch (urlobj.pathname ) {case "/api/aaa" :httpGet ((data ) => { end (data)break ;default :end ("404" )listen (3000 )function httpGet (callback ) {var data = "" get ("https://m.maoyan.com/ajax/comingList?ci=73&token=&limit=10&optimus_uuid=AC61DF20F05F11F09A8AD317E4C1BC3675378D79B8704B99A3C79EF2542CC2D4&optimus_risk_level=71&optimus_code=10" ,(res ) => {on ("data" , (chunk ) => {on ("end" , () => {callback (data)
index.html
1 2 3 4 5 6 7 8 9 10 <body > <script > fetch ("http://127.0.0.1:3000/api/aaa" ) .then (res =>json ()) .then (res => console .log (res); }) </script > </body >
2.1.5 模拟 post node 模拟客户端,请求 post 数据,返回给自己的前端页面。
1 2 3 4 5 6 7 8 9 10 11 12 13 14 15 16 17 18 19 20 21 22 23 24 25 26 27 28 29 30 31 32 33 34 35 36 37 38 39 40 41 42 43 44 45 46 var http = require ("http" )var https = require ("https" )var url = require ("url" )createServer ((req, res ) => {var urlobj = url.parse (req.url , true )writeHead (200 , {"Content-Type" : "application/json;charset=utf-8" ,"Access-Control-Allow-Origin" : "*" switch (urlobj.pathname ) {case "/api/aaa" :httpPost ((data ) => { end (data)break ;default :end ("404" )listen (3000 )function httpPost (callback ) {var data = "" var options = {hostname : "m.xiaomiyoupin.com" ,post : "443" ,path : "/mtop/market/search/placeHolder" ,method : "POST" ,headers : {"Content-Type" : "application/json" var req = https.request (options, (res ) => {on ("data" , chunk =>on ("end" , () => {callback (data)write (JSON .stringify ([{}, { "baseParam" : { "ypClient" : 1 } }]))end ()
index.html
1 2 3 4 5 6 7 8 9 10 <body > <script > fetch ("http://127.0.0.1:3000/api/aaa" ) .then (res =>json ()) .then (res => console .log (res); }) </script > </body >
2.1.6 爬虫 cheerio 安装第三方模块:
npm init
npm i cheerio@1.0.0-rc.12 - (兼容性: node18 与 cheerio1.0.0-rc.12 兼容,否则 require 报错)
cheerio 可以让解析 dom 像类似 jquery 一样。
1 2 3 4 5 6 7 8 9 10 11 12 13 14 15 16 17 18 19 20 21 22 23 24 25 26 27 28 29 30 31 32 33 34 35 36 37 38 39 40 41 42 43 44 45 46 47 48 49 50 51 52 53 54 55 56 var http = require ("http" )var https = require ("https" )var url = require ("url" )var cheerio = require ("cheerio" )createServer ((req, res ) => {var urlobj = url.parse (req.url , true )writeHead (200 , {"Content-Type" : "application/json;charset=utf-8" ,"Access-Control-Allow-Origin" : "*" switch (urlobj.pathname ) {case "/api/aaa" :httpGet ((data ) => { end (spider (data))break ;default :end ("404" )listen (3000 )function httpGet (callback ) {var data = "" get ("https://m.maoyan.com" ,(res ) => {on ("data" , (chunk ) => {on ("end" , () => {callback (data) function spider (data ) {let $ = cheerio.load (data)let $moviewlist = $(".column.content" ) let movies = []each ((index, value ) => {push ({title : $(value).find (".title" ).text (),grade : $(value).find (".grade" ).text (),actor : $(value).find (".actor" ).text (),console .log (movies);return JSON .stringify (movies)
2.2 url 解析模块 CJS const url = require('url'); ESM import url from 'url';
旧版: 废弃-也可用 2.2.1 parse()
解析 url 为不同的参数。
1 2 3 4 5 6 7 8 9 10 const url = require ('url' )const urlString = 'https://www.baidu.com:443/ad/index.html?id=8&name=mouse#tag=110' const parsedRes = url.parse (urlString, true ) console .log (parsedRes) console .log (parsedRes.pathname ); console .log (parsedRes.hash ); console .log (parsedRes.query ); console .log (parsedRes.query .name );
2.2.2 format()
与 parse() 相反,给到参数,反解析为完整的 url 路径。
1 2 3 4 5 6 7 8 9 10 11 12 13 14 15 16 17 const url = require ('url' )const urlObject = {protocol : 'https:' ,slashes : true ,auth : null ,host : 'www.baidu.com:443' ,port : '443' ,hostname : 'www.baidu.com' ,hash : '#tag=110' ,search : '?id=8&name=mouse' ,query : { id : '8' , name : 'mouse' },pathname : '/ad/index.html' ,path : '/ad/index.html?id=8&name=mouse' const parsedObj = url.format (urlObject)console .log (parsedObj)
2.2.3 resolve()
对 url 的拼接与替换。
1 2 3 4 5 6 7 8 9 10 const url = require ('url' )var a1 = url.resolve ('/one/two/three' , 'four' ) var a2 = url.resolve ('/one/two/three/' , 'four' ) var b = url.resolve ('http://example.com/' , '/one' )var c = url.resolve ('http://example.com/one' , '/two' )console .log ("a1 -> " , a1); console .log ("a2 -> " , a2); console .log ("b -> " , b); console .log ("c -> " , c);
新版: new URL() 参考官方文档说明:https://nodejs.cn/api/v18/url.html#new-urlinput-base
代替 parse()
1 2 3 4 5 6 7 8 9 const urlString = 'https://www.baidu.com:443/ad/index.html?id=8&name=mouse#tag=110' const myURL = new URL (urlString, 'https://www.baidu.com' )console .log ("myURL->" , myURL);console .log (myURL.pathname ); const params = myURL.searchParams for (const [key, value] of params) {console .log (key + ',' + value);
代替 resolve()
1 2 3 4 5 const url = require ('url' )const url2 = new URL ('/home' , 'http://127.0.0.1:3000' )console .log (url2.href );
新版 format()
1 2 3 4 5 6 const url = require ('url' )const myURL = new URL ('https://a:b@測試?abc#foo' );console .log (myURL.href ); console .log (myURL.toString ()); console .log (url.format (myURL, { fragment : false , unicode : true , auth : false }));
2.4 querystring 查询字符串 CJS const querystring = require('querystring'); ESM import querystring from 'querystring';
parse() - 解析路径参数
1 2 3 4 const str = "name=jerry&age=20&location=china" var obj = querystring.parse (str)console .log (obj); console .log (obj.name , obj.age , obj.location );
stringify() - 将对象转为路径参数
1 2 3 var myobj = { name : 'jerry' , age : '20' , location : 'china' }var mystr = querystring.stringify (myobj)console .log (mystr);
escape() - 针对网址查询字符串的特定要求优化的方式对给定的 str 执行网址百分比编码。
1 2 3 var str1 = 'id=3&city=北京&url=https://www.baidu.com' var escaped = querystring.escape (str1)console .log (escaped)
unescape() - 当将网址不安全的字符转换为查询字符串中的百分比编码时使用的函数。
1 2 3 var str2 = 'id%3D3%26city%3D%E5%8C%97%E4%BA%AC%26url%3Dhttps%3A%2F%2Fwww.baidu.com' var unescaped = querystring.unescape (str2)console .log (unescaped)
2.5 event 事件模块 CJS const EventEmitter = require('events'); ESM import { EventEmitter } from 'events';
1 2 3 4 5 6 7 8 9 10 11 12 13 const EventEmitter = require ("events" )const event = new EventEmitter ()on ("play" , () => {console .log ("事件触发了" );emit ("play" )setTimeout (() => {emit ("play" , "123456" )2000 )
应用示例:
get.js
1 2 3 4 5 6 7 8 9 10 11 12 13 14 15 16 17 18 19 20 21 22 23 24 25 26 27 28 29 30 31 32 33 34 35 36 37 38 39 40 41 var http = require ("http" )var https = require ("https" )const { EventEmitter } = require ("stream" )var url = require ("url" )var event = null createServer ((req, res ) => {var urlobj = url.parse (req.url , true )writeHead (200 , {"Content-Type" : "application/json;charset=utf-8" ,"Access-Control-Allow-Origin" : "*" switch (urlobj.pathname ) {case "/api/aaa" :new EventEmitter () on ("play" , (data ) => { end (data)httpGet ()break ;default :end ("404" )listen (3000 )function httpGet (var data = "" get ("https://m.maoyan.com/ajax/comingList?ci=73&token=&limit=10&optimus_uuid=AC61DF20F05F11F09A8AD317E4C1BC3675378D79B8704B99A3C79EF2542CC2D4&optimus_risk_level=71&optimus_code=10" ,(res ) => {on ("data" , (chunk ) => {on ("end" , () => {emit ("play" , data)
2.5 fs 文件操作模块 2.5.1 文件基本操作 CJS const fs = require('fs'); ESM import * as fs from 'fs';
1 2 3 4 5 6 7 mkdir ("./avatar" , (err ) => {if (err && err.code === "EEXIST" ) {console .log ("目录已存在" );
1 2 3 4 5 6 7 rename ("./avatar" , "./avatar2" , (err ) => {if (err && err.code === "ENOENT" ) {console .log ("要重命名的目录不存在!" );
1 2 3 4 5 6 7 8 9 10 rmdir ("./avatar" , (err ) => {console .log (err);if (err && err.code === "ENOENT" ) {console .log ("要删除目录不存在!" );if (err && err.code === "ENOTEMPTY" ) {console .log ("要删除目录不为空!" );
1 2 3 4 5 6 7 writeFile ("./avatar/a.txt" , "你好" , (err ) => {console .log (err); if (!err) {console .log ("覆盖写入成功" );
1 2 3 4 5 6 7 appendFile ("./avatar/a.txt" , "\nhello,node" , (err ) => {console .log (err); if (!err) {console .log ("追加写入成功" );
1 2 3 4 5 6 readFile ("./avatar/a.txt" , "utf-8" , (err, data ) => {if (!err) {console .log (data);
1 2 3 4 5 6 7 unlink ("./avatar/a.txt" , (err ) => {console .log (err);if (!err) {console .log ("文件删除成功!" );
1 2 3 4 5 6 readdir ("./avatar" , (err, data ) => {if (!err) {console .log (data);
1 2 3 4 5 6 stat ("./avatar" , (err, data ) => {console .log (data);console .log (data.isFile ()); console .log (data.isDirectory ());
2.5.2 文件删除健壮版 1 2 3 4 5 6 7 8 9 10 11 12 13 14 const fs = require ("fs" ).promises let path = "./avatar"
1 2 3 4 5 readdir (path).then (async data => {await Promise .all (data.map (item =>unlink (`${path} /${item} ` )))await fs.rmdir ("./avatar" )
2.6 stream 流模块 可以从文件中用流的方式读取和写入,以及复制文件,核心方法 fs.createReadStream, fs.createWriteStream, rs.pipe(ws)
1 2 3 4 5 6 7 8 9 10 11 12 const fs = require ("fs" )const rs = fs.createReadStream ("./1.txt" , "utf-8" )on ("data" , (chunk ) => {console .log ("chunk:" , chunk);on ("end" , () => {console .log ("end" );on ("error" , () => {console .log ("error" );
1 2 3 4 5 6 7 const fs = require ("fs" )const ws = fs.createWriteStream ("./2.txt" , "utf-8" )write ("aaaaaaaaaaaa\n" )write ("bbbbbbbbb\n" )write ("ccccccccccc" )end ()
1 2 3 4 5 const fs = require ("fs" )const rs = fs.createReadStream ("./1.txt" )const ws = fs.createWriteStream ("./2.txt" )pipe (ws)
2.7 zlib 压缩模块 CJS const zlib = require('zlib'); ESM import zlib from 'zlib';
1 2 3 4 5 6 7 8 9 10 11 12 13 14 15 const fs = require ("fs" )const http = require ("http" )const zlib = require ("zlib" )const gzip = zlib.createGzip ()createServer ((req, res ) => {const rs = fs.createReadStream ("./index.js" )writeHead (200 , {"content-type" : "application/x-javascript;charset=utf-8" ,"content-encoding" : "gzip" pipe (gzip).pipe (res)listen (3000 , () => {console .log ("server start" );
2.8 crypto 加密模块 CJS const crypto = require('crypto'); ESM import crypto from 'crypto';
crypto 目的为了提供通用的加密和哈希算法。
MD5 MD5是一种常用的哈希算法,用于给任意数据一个签名,这个签名通常用一个十六进制的字符串表示。(简单密码可以,重要密码有一定撞库风险)
1 2 3 4 const hash = crypto.createHash ("md5" )update ("123456" )console .log (hash.digest ("hex" ));
SHA1 Hmac算法也是一种哈希算法,可以利用MD5或SHA1等哈希算法,不同的是,Hmac还需要一个密钥串。
1 2 3 4 5 const hash = crypto.createHmac ("sha256" , "jerry" )update ("123456" )console .log (hash.digest ("hex" ));
AES-对称加密 对称加密算法,加解密都用同一个密钥。
1 2 3 4 5 6 7 8 9 10 11 12 function encrypt (key, iv, data ) {let decipher = crypto.createCipheriv ('aes-128-cbc' , key, iv);return decipher.update (data, 'binary' , 'hex' ) + decipher.final ('hex' );function decrypt (key, iv, crypted ) {Buffer .from (crypted, 'hex' ).toString ('binary' );let decipher = crypto.createDecipheriv ('aes-128-cbc' , key, iv);return decipher.update (crypted, 'binary' , 'utf8' ) + decipher.final ('utf8' );
验证:
1 2 3 4 5 6 7 let key = "abcdef1234567890" let iv = "1234567890abcdef" let data = "jerry123456" let dataEncrypt = encrypt (key, iv, data)console .log ("加密结果:" , dataEncrypt); let dataSource = decrypt (key, iv, dataEncrypt)console .log ("解密结果:" , dataSource);