03-React组件受控与通信

参考:
- React 官网:https://zh-hans.react.dev/
- React 教程:https://zh-hans.react.dev/learn
1.受控与非受控组件
1.1 表单非受控组件
ref 来从 DOM 节点中获取表单数据,就是非受控组件- 如果你不介意代码美观性,并且希望快速编写代码,使用非受控组件往往可以减少你的代码量。否则,你应该使用受控组件。
- 在 React 渲染生命周期时,表单元素上的 value 将会覆盖 DOM 节点中的值,在非受控组件中,你经常希望 React 能赋予组件一个初始值,但是不去控制后续的更新。 在这种情况下, 你可以指定一个
defaultValue属性,而不是 value 。 - 同样,
<input type="checkbox">和<input type="radio">支持 defaultChecked ,<select>和<textarea>支持 defaultValue 。
非受控组件表单示例:
1 | |
1.2 表单受控组件
由于在表单元素上设置了 value 属性,因此显示的值将始终为 this.state.value ,这使得 React 的 state 成为唯一数据源。由于 handlechange 在每次按键时都会执行并更新 React 的 state,因此显示的值将随着用户输入而更新。
对于受控组件来说,输入的值始终由 React 的 state 驱动。你也可以将 value 传递给其他 UI 元素,或者通过其他事件处理函数重置,但这意味着你需要编写更多的代码。
受控表单示例:
1 | |
注意: 另一种说法(广义范围的说法),React 组件的数据渲染是否被调用者传递的
props 完全控制,控制则为受控组件,否则非受控组件。
案例:列表跟随输入筛选
1 | |
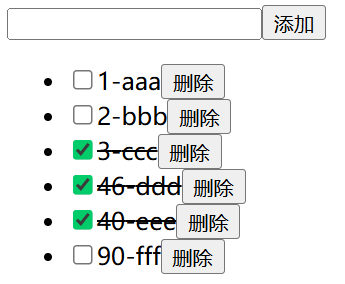
案例:todolist - 受控组件
- checkbox 多选框 与 删除线 关联 受控组件 input checkbox 框的逻辑
1 | |
2. 组件通信
2.1 父子通信
父传子:
传递属性—— 父组件上自定义标签属性 xxx,子组件使用this.props.xxx接收子传父:
传递方法—— 父组件上自定义事件回调 callback 函数 myevent(如修改父state),子组件使用this.props.myevent()触发父组件执行函数ref 标记(父组件拿到子组件的引用,从而调用子组件的方法)——比**表单域组件(父子通信)**的方式更方便。- 在父组件中清除子组件的 input 输入框的 value 值。
this.refs.form.reset()
- 在父组件中清除子组件的 input 输入框的 value 值。
父子通信示例:
1 | |
效果:
受控组件(父子通信)
目录
1 | |
index.js
1 | |
Navbar.js
1 | |
Tabbar.js - 类组件 & 函数组件
1 | |
效果:点击导航栏的 center,会导致组件内容切换为 center的内容,且 Tabbar 也会高亮到 我的。
表单域组件(父子通信)
1 | |
表单域组件(ref 方式)
1 | |
2.2 非父子通信
① 状态提升(中间人模式)
React中的状态提升就是将多个组件需要共享的状态提升到它们最近的父组件上,在父组件上改变这个状态然后通过props分发给子组件。
1 | |
效果:
② 发布订阅模式
1 | |
效果:同上。
③ context 状态树传参
React 提供的跨级通信方案,原理是 生产者消费者 模式。
注意:GlobalContext.Consumer 内必须是
回调函数写法,通过 context 方法改变根组件状态优点:跨组件访问数据
缺点:react 组件树种某个上级组件 shouldComponetUpdate 返回 false,当 context 更新时,不会引起下级组件更新
1 | |
效果:
3. 插槽
this.props.children
this.props.children[index] 固定属性 children 数组,默认是插槽替换过来所有内容,也可以通过下标控制插槽内容的顺序。
- 提高组件的复用性
- 一定程度减少父子通信
1 | |
效果:
1 | |
插槽抽屉:
1 | |
