参考:
1. 路由说明
路由是根据不同的 url 地址展示不同的内容或页面。
一个针对 React 而设计的路由解决方案、可以友好的帮你解决 React components 到 URL 之间的同步映射关系。
2. React Router V6
2.1 简介
react-router,核心模块,包含 React 路由大部分的核心功能,包括路由匹配算法,包括路由匹配算法和大部分核心组件和钩子react-router-dom,React 应用中用于路由的软件包,包括 react-router 的所有内容,并添加了一些特定于 DOM 的 API,包括但不限于 BrowserRouter、HashRouter 和 Linkreact-router-native,用于开发 React Native 应用,包括 react-router 的所有内容,并添加了一些特定于 React Native 的 API,包括但不限于 NativeRouter 和 Link
2.2 对比
V5 与 V6 的对比
包大小:v5 20.8kb,v6 10.8kb
<Router> 特性变更:
- path: 与当前页面对应的 URL 匹配
- element: 新增用于决定路由匹配时,渲染哪个组件。代替v5的 component 和 render
<Routes> 代替了 <Switch>
<Outlet></Outlet> 让嵌套路由更简单
useNavigate 代替 useHistory
移除了 <NavLink/> 的 activeClassName 和 activeStyle
钩子 useRoutes 代替 react-router-config
2.3 安装
安装:npm i react-router-dom@6
版本:"react-router-dom": "^6.30.3"
3.React Router V6 使用
3.0 路由配置参考(★)
router/index.js + 懒加载 - 完整配置 (参考3.7路由懒加载)
1
2
3
4
5
6
7
8
9
10
11
12
13
14
15
16
17
18
19
20
21
22
23
24
25
26
27
28
29
30
31
32
33
34
35
36
37
38
39
40
41
42
| import { Route, Routes } from 'react-router-dom'
import AuthComponent from '../components/AuthComponent'
import LazyLoad from '../components/LazyLoad'
import Redirect from '../components/Redirect'
import Film from '../views/Film'
export default function MRouter() {
return (
<div>
<Routes>
{/* <Route path="/" element={<Film />} /> */}
{/* <Route index element={<Film />} /> */} {/* 只匹配父路径 */}
{/* 二级路由:页面内替换掉路由容器 <Outlet />,此处 path="/films/nowplaying" 或 path="nowplaying" */}
<Route path="/films" element={<Film />}>
{/* <Route index element={<Nowplaying />} /> */} {/* 二级路由默认重定向,方式一 */}
<Route index element={<Redirect to="/films/nowplaying" />} /> {/* 二级路由默认重定向,方式二 */}
<Route path="nowplaying" element={LazyLoad("films/Nowplaying")} /> {/* 注意 LazyLoad 的二级路径 */}
<Route path="comingsoon" element={LazyLoad("films/Comingsoon")} />
</Route>
{/* <Route path="/cinemas" element={<Cinema />} /> */}
{/* 懒加载 */}
<Route path="/cinemas" element={LazyLoad("Cinema")} />
{/* 二级路由:整个页面组件进行替换,即 url看着是二级路径,但实际组件是全新替换 */}
<Route path="/cinemas/search" element={LazyLoad("Search")} />
{/* 路由拦截:需要封装独立验证组件来让组件每次都会执行拦截验证逻辑 */}
<Route path="/center" element={<AuthComponent>
{LazyLoad("Center")} {/* <Center /> 对应组件中 props.children 即为 slot 插槽替换值 */}
</AuthComponent>} />
<Route path="/login" element={LazyLoad("Login")} />
{/* <Route path="/detail" element={<Detail />} /> */}
{/* 动态路由:匹配 /detail/xxx 对应 myid 拿到的就是 xxx 值 */}
<Route path="/detail/:myid" element={LazyLoad("Detail")} />
{/* 重定向方案1:匹配 / 根目录 */}
{/* <Route path="/" element={<Navigate to="/films" />} /> */}
{/* 重定向方案2:匹配 / 根目录,自定义组件 Redirect.js */}
<Route path="/" element={<Redirect to="/films" />} />
{/* 404兜底路由:未匹配到任何路由,进入 404 */}
<Route path="*" element={LazyLoad("NotFound")} />
</Routes>
</div>
)
}
|
目录:
1
2
3
4
5
6
7
8
| src/
router/
index.js
views/
Center.js
Cinema.js
Film.js
App.js
|
3.1 路由使用
基本使用
App.js - 引入 HashRouter 路由模式(参考3.6路由模式),路径中拼接 # 进行访问,如 localhost:3000/#/films
1
2
3
4
5
6
7
8
9
10
11
12
13
14
| import { HashRouter } from 'react-router-dom'
import './App.css'
import MRouter from './router'
function App() {
return (
<HashRouter> {/* 指定 HashRouter 路由模式 */}
<MRouter /> {/* 路由组件封装 router/index.js */}
<Tabbar />
</HashRouter>
)
}
export default App
|
router/index.js
1
2
3
4
5
6
7
8
9
10
11
12
13
14
15
16
17
18
19
20
21
22
23
24
25
26
27
28
29
| import { Route, Routes } from 'react-router-dom'
import Redirect from '../components/Redirect'
import Center from '../views/Center'
import Cinema from '../views/Cinema'
import Film from '../views/Film'
import NotFound from '../views/NotFound'
export default function MRouter() {
return (
<div>
<Routes>
{/* <Route path="/" element={<Film />} /> */}
{/* <Route index element={<Film />} /> */} {/* 只匹配父路径 */}
<Route path="/films" element={<Film />} />
<Route path="/cinemas" element={<Cinema />} />
<Route path="/center" element={<Center />} />
{/* 重定向方案1:匹配 / 根目录 */}
{/* <Route path="/" element={<Navigate to="/films" />} /> */}
{/* 重定向方案2:匹配 / 根目录,自定义组件 Redirect.js */}
<Route path="/" element={<Redirect to="/films" />} />
{/* 404兜底路由:未匹配到任何路由,进入 404 */}
<Route path="*" element={<NotFound />} />
</Routes>
</div>
)
}
|
一级路由
1
2
3
| <Route path="/films" element={<Film />} />
<Route path="/cinemas" element={<Cinema />} />
<Route path="/center" element={<Center />} />
|
访问:
localhost:3000/#/films
localhost:3000/#/cinemas
localhost:3000/#/center
多级路由
第一种:整页(或组件)替换
1
2
3
| <Route path="/cinemas" element={<Cinema />} />
{/* 二级路由:整个页面组件进行替换,即 url看着是二级路径,但实际组件是全新替换 */}
<Route path="/cinemas/search" element={<Search />} />
|
第二种:只替换内部组件,需要路由容器(决定替换位置); index 代表默认该组件的根目录会默认进入/加载的组件。
1
2
3
4
5
6
7
| {/* 二级路由:页面内替换掉路由容器 <Outlet />,此处 path="/films/nowplaying" 或 path="nowplaying" */}
<Route path="/films" element={<Film />}>
{/* <Route index element={<Nowplaying />} /> */} {/* 二级路由默认重定向,方式一 */}
<Route index element={<Redirect to="/films/nowplaying" />} /> {/* 二级路由默认重定向,方式二:自定义组件 Redirect.js */}
<Route path="nowplaying" element={<Nowplaying />} />
<Route path="comingsoon" element={<Comingsoon />} />
</Route>
|
views/Film.js
1
2
3
4
5
6
7
8
9
10
11
| import { Outlet } from 'react-router-dom'
export default function Film() {
return (
<div>
<div style={{ width: '100%', height: '150px', backgroundColor: 'yellow' }}>大轮播</div>
{/* 路由容器,如加载子组件 Nowplaying 或 Comingsoon */}
<Outlet />
</div>
)
}
|
3.2 重定向×2
方案1:
1
2
| {/* 重定向方案1:匹配 / 根目录 */}
<Route path="/" element={<Navigate to="/films" />} />
|
方案2:
1
2
| {/* 重定向方案2:匹配 / 根目录,自定义组件 Redirect.js */}
<Route path="/" element={<Redirect to="/films" />} />
|
方案2 需要定义 components/Redirect.js
1
2
3
4
5
6
7
8
9
10
11
| import { useEffect } from 'react'
import { useNavigate } from 'react-router-dom'
export default function Redirect({ to }) {
const navigate = useNavigate()
useEffect(() => {
navigate(to, { replace: true })
})
return <div>Redirect</div>
}
|
navigate(-1):返回上一页(等价于 V5 的 history.goBack())navigate(1):前进下一页(等价于 V5 的 history.goForward())
3.3 404 路由
1
2
| {/* 404兜底路由:未匹配到任何路由,进入 404 */}
<Route path="*" element={<NotFound />} />
|
3.4 声明|编程 式导航
声明式导航
<NavLink> 组件,可以做为声明式导航使用。
to="/xxx" 或 to={aaa},也支持变量定义动态跳转className,支持回调函数写法,形参解构有一个 isActive 参数,用于判断后取值自定义的高亮 css 样式
compontents/Tabbar.js
1
2
3
4
5
6
7
8
9
10
11
12
13
14
15
16
17
18
19
20
21
22
23
24
25
26
27
28
29
30
31
32
| import { NavLink } from 'react-router-dom'
import './Tabbar.css'
export default function Tabbar() {
return (
<footer>
<ul>
<li>
{/* to={xxx} 也支持变量定义动态跳转,className 支持回调函数写法,形参解构有一个 isActive 参数 */}
<NavLink to="/films" className={({ isActive }) => (isActive ? 'jerry-active' : '')}>
电影
</NavLink>
</li>
<li>
<NavLink to="/cinemas" className={({ isActive }) => (isActive ? 'jerry-active' : '')}>
影院
</NavLink>
</li>
<li>
<NavLink to="/messages" className={({ isActive }) => (isActive ? 'jerry-active' : '')}>
资讯
</NavLink>
</li>
<li>
<NavLink to="/center" className={({ isActive }) => (isActive ? 'jerry-active' : '')}>
我的
</NavLink>
</li>
</ul>
</footer>
)
}
|
component/Tabbar.css
1
2
3
| .jerry-active{
color: red;
}
|
编程式导航 ①
const navigate = useNavigate() 方法可以做编程式导航。
navegate(path),跳转不同的路径,或者 url 动态参数拼接传递
const [searchParams, setSearchParams] = useSearchParams() 方法可以获取跳转过来的 url 上携带的参数。
searchParams.get("id"),获取 url 上携带的参数,如 id 字段的值setSearchParams({id: 888}),可以在当前页面继续扩展跳转到当前 Detail 组件上的值,以拿到新的 id,渲染新的 Detail 页面
views/films/Nowplaying.js
1
2
3
4
5
6
7
8
9
10
11
12
13
14
15
16
17
18
19
20
21
22
23
24
25
26
27
28
29
30
31
32
33
34
35
| import axios from 'axios'
import { useEffect, useState } from 'react'
import { useNavigate } from 'react-router-dom'
export default function Nowplaying() {
const [filmList, setFilmList] = useState([])
useEffect(() => {
axios({
url: 'https://m.maizuo.com/gateway?cityId=410100&pageNum=1&pageSize=10&type=1&k=6167680',
headers: {
'x-client-info': '{"a":"3000","ch":"1002","v":"5.2.1","e":"17689720181688867040133121"}',
'x-host': 'mall.film-ticket.film.list',
},
}).then(res => {
console.log(res.data.data.films)
setFilmList(res.data.data.films)
})
}, [])
const navigate = useNavigate()
const handleChangePage = (id) => {
navigate(`/detail?id=${id}`)
}
return (
<div>
<ul>
{
filmList.map(item => (
<li key={item.filmId} onClick={() => handleChangePage(item.filmId)}>{item.name}</li>
))
}
</ul>
</div>
)
}
|
views/Detail.js
1
2
3
4
5
6
7
8
9
10
11
12
13
14
| import { useSearchParams } from 'react-router-dom';
export default function Detail() {
const [searchParams, setSearchParams] = useSearchParams()
console.log(searchParams.get("id"));
return (
<div>Detail
<button onClick={() => {
setSearchParams({id:1000}) //继续做跳转当前组件的逻辑,解析新的参数渲染新的内容
}}>猜你喜欢(扩展)</button>
</div>
)
}
|
Detail 对应路由配置 router/index.js
1
| <Route path="/detail" element={<Detail />} />
|
编程式导航 ②
views/films/Nowplaying.js - 改动
1
2
3
4
5
| const navigate = useNavigate()
const handleChangePage = (id) => {
navigate(`/detail/${id}`)
}
|
views/Detail.js
1
2
3
4
5
6
7
8
9
10
11
12
13
14
| import { useNavigate, useParams } from 'react-router-dom';
export default function Detail() {
const params = useParams()
console.log(params.myid);
const navigate = useNavigate()
return (
<div>Detail
<button onClick={() => {
navigate("/detail/888") //跳转当前组件,解析新的参数渲染新的内容
}}>猜你喜欢</button>
</div>
)
}
|
Detail 对应路由配置 router/index.js
1
2
| {/* 动态路由:匹配 /detail/xxx 对应 myid 拿到的就是 xxx 值 */}
<Route path="/detail/:myid" element={<Detail />} />
|
3.5 路由拦截
封装组件 以解决每次进入路由时,执行组件的判断逻辑,如登陆的 token 校验判断 <AuthComponent>。
路由配置:router/index.js
1
2
3
4
5
| {/* 路由拦截:需要封装独立验证组件来让组件每次都会执行拦截验证逻辑 */}
<Route path="/center" element={<AuthComponent>
<Center /> {/* <Center /> 对应组件中 props.children 即为 slot 插槽替换值 */}
</AuthComponent>} />
<Route path="/login" element={<Login />} />
|
components/AuthComponent.js
1
2
3
4
5
6
7
| import Redirect from "./Redirect"
export default function AuthComponent({ children }) {
const isLogin = localStorage.getItem("token")
return isLogin ? children : <Redirect to="/login" />
}
|
views/Login.js
1
2
3
4
5
6
7
8
9
10
11
12
13
14
| import { useNavigate } from "react-router-dom"
export default function Login() {
const navigate = useNavigate()
return (
<div>
<input type='text' />
<button onClick={() => {
localStorage.setItem("token", "jerry")
navigate("/center")
}}>登陆</button>
</div>
)
}
|
3.6 路由模式
HashRouter - 路径携带 # 号分隔,分享时可能会被截断
1
2
3
4
5
6
7
8
9
10
| import { HashRouter } from 'react-router-dom'
function App() {
return (
<HashRouter>
...
</HashRouter>
)
}
export default App
|
BrowserRouter - 路径没有 # 号,更类似与 api,也更美观,即 vue 的路由 history 模式。
1
2
3
4
5
6
7
8
9
10
| import { BrowserRouter } from 'react-router-dom'
function App() {
return (
<BrowserRouter>
...
</BrowserRouter>
)
}
export default App
|
使用 history 模式理由有二:
- 路径好看,专业
- 分享url时,路径不会被截断。
风险问题(官方说明):
不过这种模式要玩好,还需要后台配置支持。因为我们的应用是个单页客户端应用,如果后台没有正确的配置,当用户在浏览器直接访问 http://oursite.com/user/id 就会返回 404,这就不好看了。
所以呢,你要在服务端增加一个覆盖所有情况的候选资源:如果 URL 匹配不到任何静态资源,则应该返回同一个 index.html 页面,这个页面就是你 app 依赖的页面。
【总结】如果后端没有配置默认返回index.html,就可能会出现404的情况。
【解决】nginx 配置加这一句:
1
2
3
| location / {
try_files $uri $uri/ /index.html;
}
|
3.7 路由懒加载(★)
React.lazy() + <React.Suspense> 组合进行封装,懒加载以提高性能,按需加载。
components/LazyLoad.js - 最简单版本
1
2
3
4
5
6
7
8
9
10
11
| import React from 'react'
export default function LazyLoad(path) {
const Component = React.lazy(() => import(`../views/${path}`))
return (
<React.Suspense fallback={<>加载中...</>}>
<Component />
</React.Suspense>
)
}
|
components/LazyLoad.js - 使用 NotFound 组件兜底,比如有的组件不存在触发导入失败,需要进 404 【推荐】
1
2
3
4
5
6
7
8
9
10
11
12
13
14
15
16
17
18
19
20
21
22
23
24
25
26
| import React, { Suspense } from 'react';
import NotFound from '../views/NotFound';
export default function LazyLoad(path) {
const loadComponent = async () => {
try {
const module = await import(`../views/${path}`);
return module;
} catch (error) {
return { default: NotFound };
}
};
const Component = React.lazy(loadComponent);
return (
<Suspense fallback={<>加载中...</>}>
<Component />
</Suspense>
);
}
|
路由配置:router/index.js - 使用懒加载(<Routes>标签写法完整版)记得去掉顶部 import 导包,否则懒加载等于没加,无效
1
2
3
4
5
6
7
8
9
10
11
12
13
14
15
16
17
18
19
20
21
22
23
24
25
26
27
28
29
30
31
32
33
34
35
36
37
38
39
40
41
42
| import { Route, Routes } from 'react-router-dom'
import AuthComponent from '../components/AuthComponent'
import LazyLoad from '../components/LazyLoad'
import Redirect from '../components/Redirect'
import Film from '../views/Film'
export default function MRouter() {
return (
<div>
<Routes>
{/* <Route path="/" element={<Film />} /> */}
{/* <Route index element={<Film />} /> */} {/* 只匹配父路径 */}
{/* 二级路由:页面内替换掉路由容器 <Outlet />,此处 path="/films/nowplaying" 或 path="nowplaying" */}
<Route path="/films" element={<Film />}>
{/* <Route index element={<Nowplaying />} /> */} {/* 二级路由默认重定向,方式一 */}
<Route index element={<Redirect to="/films/nowplaying" />} /> {/* 二级路由默认重定向,方式二 */}
<Route path="nowplaying" element={LazyLoad("films/Nowplaying")} /> {/* 注意 LazyLoad 的二级路径 */}
<Route path="comingsoon" element={LazyLoad("films/Comingsoon")} />
</Route>
{/* <Route path="/cinemas" element={<Cinema />} /> */}
{/* 懒加载 */}
<Route path="/cinemas" element={LazyLoad("Cinema")} />
{/* 二级路由:整个页面组件进行替换,即 url看着是二级路径,但实际组件是全新替换 */}
<Route path="/cinemas/search" element={LazyLoad("Search")} />
{/* 路由拦截:需要封装独立验证组件来让组件每次都会执行拦截验证逻辑 */}
<Route path="/center" element={<AuthComponent>
{LazyLoad("Center")} {/* <Center /> 对应组件中 props.children 即为 slot 插槽替换值 */}
</AuthComponent>} />
<Route path="/login" element={LazyLoad("Login")} />
{/* <Route path="/detail" element={<Detail />} /> */}
{/* 动态路由:匹配 /detail/xxx 对应 myid 拿到的就是 xxx 值 */}
<Route path="/detail/:myid" element={LazyLoad("Detail")} />
{/* 重定向方案1:匹配 / 根目录 */}
{/* <Route path="/" element={<Navigate to="/films" />} /> */}
{/* 重定向方案2:匹配 / 根目录,自定义组件 Redirect.js */}
<Route path="/" element={<Redirect to="/films" />} />
{/* 404兜底路由:未匹配到任何路由,进入 404 */}
<Route path="*" element={LazyLoad("NotFound")} />
</Routes>
</div>
)
}
|
效果:点击到对应组件时,才会加载对应组件。
3.8 withRouter-类组件跳转方法
如果项目中同时使用了 Hooks 函数式组件 和 类组件时,在类组件中实现跳转的方案如下。
示例:Nowplaying.js >> FilmItem.js >> withRouter.js
components/withRouter.js
1
2
3
4
5
6
7
8
9
10
11
| import { useNavigate, useParams, useLocation } from "react-router-dom"
export default function withRouter(Component) {
return function (props) {
const push = useNavigate()
const match = useParams()
const location = useLocation()
return <Component a="1" {...props} history={{ push, match, location }} />
}
}
|
views/films/FilmItem.js
- 需要跳转的类组件使用
export default withRouter(组件名) 导出,该组件就拥有了 this.props.history 被增强的能力
- this.props.history.push 跳转页面
- this.props.history.match 获取参数
- this.props.history.location 获取当前路由
1
2
3
4
5
6
7
8
9
10
11
12
13
14
15
16
17
18
19
20
21
22
23
24
25
26
27
28
29
30
31
32
33
34
35
36
37
38
39
| import { Component } from 'react'
import withRouter from '../../components/withRouter';
class FilmItem extends Component {
render() {
return (
<div>
<li onClick={() => { this.handleChangePage(this.props.filmId) }}>{this.props.name}</li>
</div>
)
}
handleChangePage(id) {
console.log(id);
this.props.history.push(`/detail/${id}`)
}
}
export default withRouter(FilmItem)
|
views/films/Nowplaying.js
1
2
3
4
5
6
7
8
9
10
11
12
13
14
15
16
17
18
19
20
21
22
23
24
25
26
27
28
29
30
| import axios from 'axios'
import { useEffect, useState } from 'react'
import FilmItem from './FilmItem'
export default function Nowplaying() {
const [filmList, setFilmList] = useState([])
useEffect(() => {
axios({
url: 'https://m.maizuo.com/gateway?cityId=410100&pageNum=1&pageSize=10&type=1&k=6167680',
headers: {
'x-client-info': '{"a":"3000","ch":"1002","v":"5.2.1","e":"17689720181688867040133121"}',
'x-host': 'mall.film-ticket.film.list',
},
}).then(res => {
console.log(res.data.data.films)
setFilmList(res.data.data.films)
})
}, [])
return (
<div>
<ul>
{
filmList.map(item => (
<FilmItem key={item.filmId} {...item}></FilmItem> /* 嵌入 FilmItem 组件 */
))
}
</ul>
</div>
)
}
|
3.9 useRoutes-钩子配置路由
useRoutes - React Router V6 新增的 “路由配置转组件” Hook。
不用写一堆 <Routes> <Route path="/xx" element={xx} /> </Routes>,而是用一个数组定义所有路由规则,useRoutes 会自动帮你生成对应的路由组件。
路由配置:router/index.js - 第二个版本(与 vue-router 风格一致)
1
2
3
4
5
6
7
8
9
10
11
12
13
14
15
16
17
18
19
20
21
22
23
24
25
26
27
28
29
30
31
32
33
34
35
36
37
38
39
40
41
42
43
44
45
46
47
48
49
50
51
52
53
54
55
56
57
58
59
60
61
62
| import { useRoutes } from 'react-router-dom'
import AuthComponent from '../components/AuthComponent'
import LazyLoad from '../components/LazyLoad'
import Redirect from '../components/Redirect'
export default function MRouter() {
const element = useRoutes([
{
path: "/films",
element: LazyLoad("Film"),
children: [
{
path: "",
element: <Redirect to="/films/nowplaying" />,
},
{
path: "nowplaying",
element: LazyLoad("films/Nowplaying"),
},
{
path: "comingsoon",
element: LazyLoad("films/Comingsoon"),
},
]
},
{
path: "/detail/:myid",
element: LazyLoad("Detail")
},
{
path: "/cinemas",
element: LazyLoad("Cinema")
},
{
path: "/cinemas/search",
element: LazyLoad("Search")
},
{
path: "/messages",
element: LazyLoad("Message")
},
{
path: "/login",
element: LazyLoad("Login")
},
{
path: "/center",
element: <AuthComponent> {LazyLoad("Center")} </AuthComponent>
},
{
path: "/",
element: <Redirect to="/films" />
},
{
path: "*",
element: LazyLoad("NotFound")
}
])
return (
element
)
}
|
4. 反向代理
4.1 官网方案
官网方案:https://create-react-app.dev/docs/proxying-api-requests-in-development/#configuring-the-proxy-manually
注意:此功能支持更高版本。react-scripts@2.0.0
如果这个选项对你来说不够灵活,你可以直接访问 Express 应用实例,并连接你自己的代理中间件。proxy
你可以将此功能与 中的属性结合使用,但建议将所有逻辑整合到 。proxy package.json src/setupProxy.js
首先,使用npm或Yarn安装:http-proxy-middleware
1
2
3
| $ npm i http-proxy-middleware --save
$ yarn add http-proxy-middleware
|
接下来,创建并放置以下内容:src/setupProxy.js
1
2
3
4
5
| const { createProxyMiddleware } = require('http-proxy-middleware');
module.exports = function (app) {
};
|
你现在可以按自己的意愿注册代理票了!这里有一个使用上述方法的例子:http-proxy-middleware
1
2
3
4
5
6
7
8
9
10
11
| const { createProxyMiddleware } = require('http-proxy-middleware');
module.exports = function (app) {
app.use(
'/api',
createProxyMiddleware({
target: 'http://localhost:5000',
changeOrigin: true,
})
);
};
|
注:你不需要在任何地方导入这个文件。当你启动开发服务器时,它会自动注册。
注:该文件仅支持 Node 的 JavaScript 语法。确保只使用支持的语言功能(例如不支持Flow、ES模块等)。
注:将路径传递给代理函数,允许你对路径使用整体匹配和/或模式匹配,这比快速路由匹配更灵活。
4.2 实现代码
安装:npm i http-proxy-middleware@2 - 使用大版本 2 开头,才能兼容当前使用的路由技术栈。
src/setupProxy.js - 修改此文件一定注意必须重启当前服务!
- 匹配请求前缀的请求 url 才会替换反向代理配置的域名,不匹配的则不会替换域名。
1
2
3
4
5
6
7
8
9
10
11
12
13
| const { createProxyMiddleware } = require('http-proxy-middleware');
module.exports = function (app) {
app.use(
'/ajax',
createProxyMiddleware({
target: 'https://m.maoyan.com',
changeOrigin: true,
})
);
};
|
views/films/Comingsoon.js
1
2
3
4
5
6
7
8
9
10
11
12
13
14
15
16
17
18
19
20
21
22
23
24
25
26
27
28
| import axios from "axios"
import { useEffect, useState } from "react"
import FilmItem from "./FilmItem"
export default function Comingsoon() {
const [filmList, setFilmList] = useState([])
useEffect(() => {
axios({
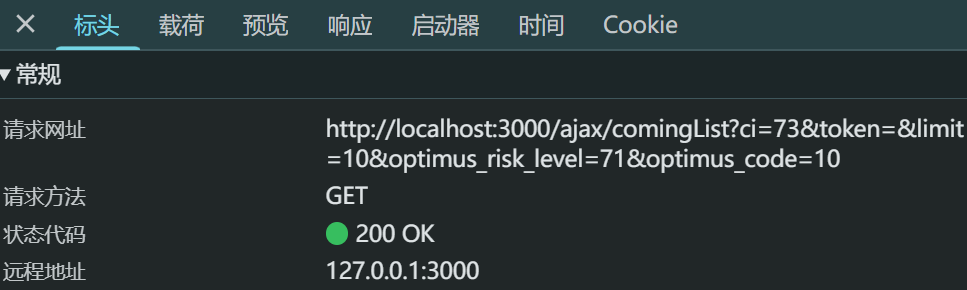
url: '/ajax/comingList?ci=73&token=&limit=10&optimus_risk_level=71&optimus_code=10',
}).then(res => {
console.log(res.data)
setFilmList(res.data.coming)
})
}, [])
return (
<div>
<ul>
{
filmList.map(item => (
<FilmItem key={item.id} filmId={item.id} name={item.nm}></FilmItem>
))
}
</ul>
</div>
)
}
|
效果:成功请求。